How to Configure an HSGQ ODI / DFP-34X-2C2 GPON ONU SFP Module with Airtel Fiber
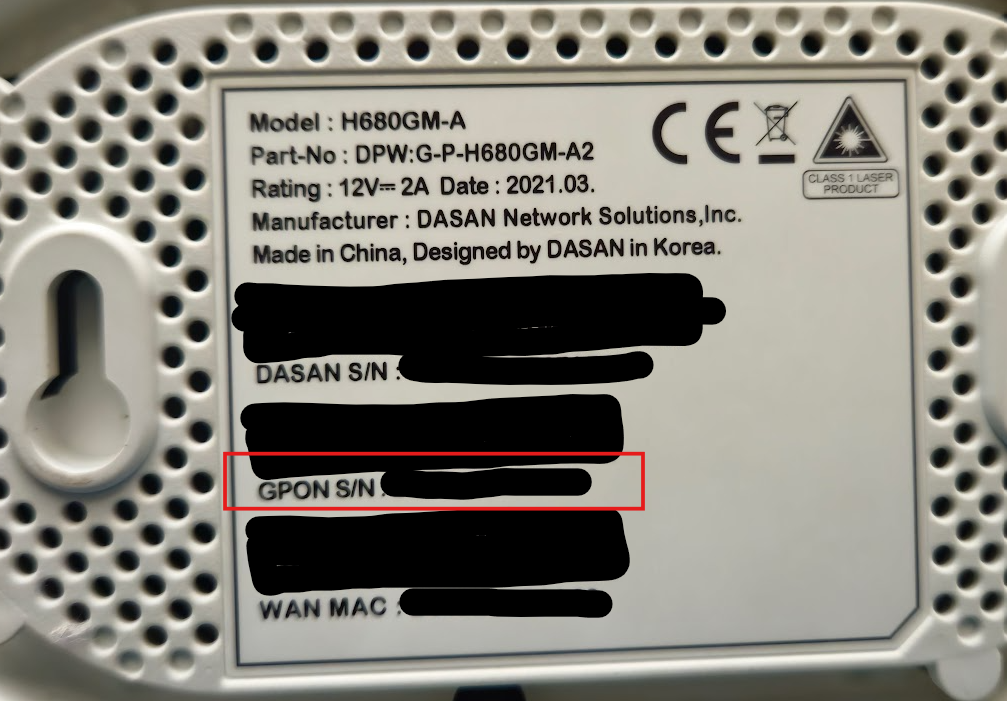
Step 1: Retrieve GPON Serial Number from Airtel Router
- Check the back of your Airtel Fiber Router.
- Locate and copy the GPON S/N.
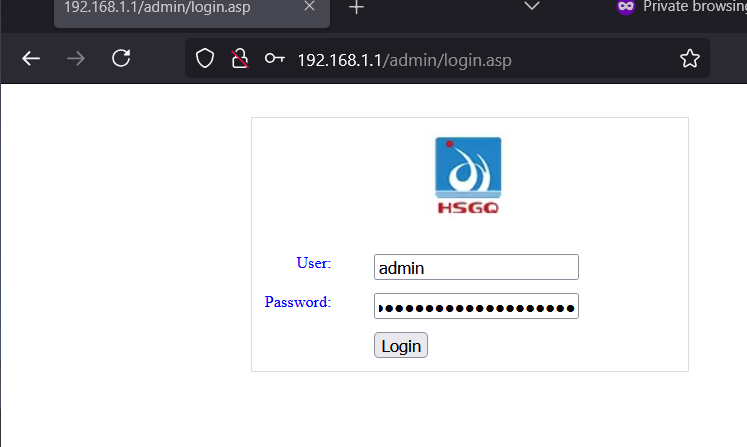
Step 2: Access the SFP Module GUI
- Open a web browser and go to http://192.168.1.1 (default login credentials are "admin" as the username and "admin" as the password)
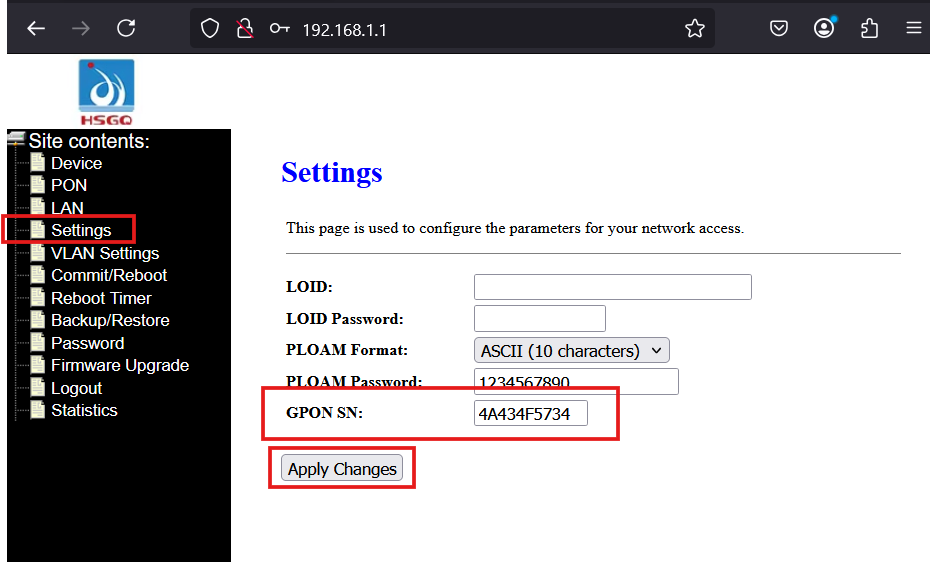
- Navigate to Settings.
- In the GPON SN field, enter the GPON serial number you copied from the Airtel router.
- Click Apply Changes.
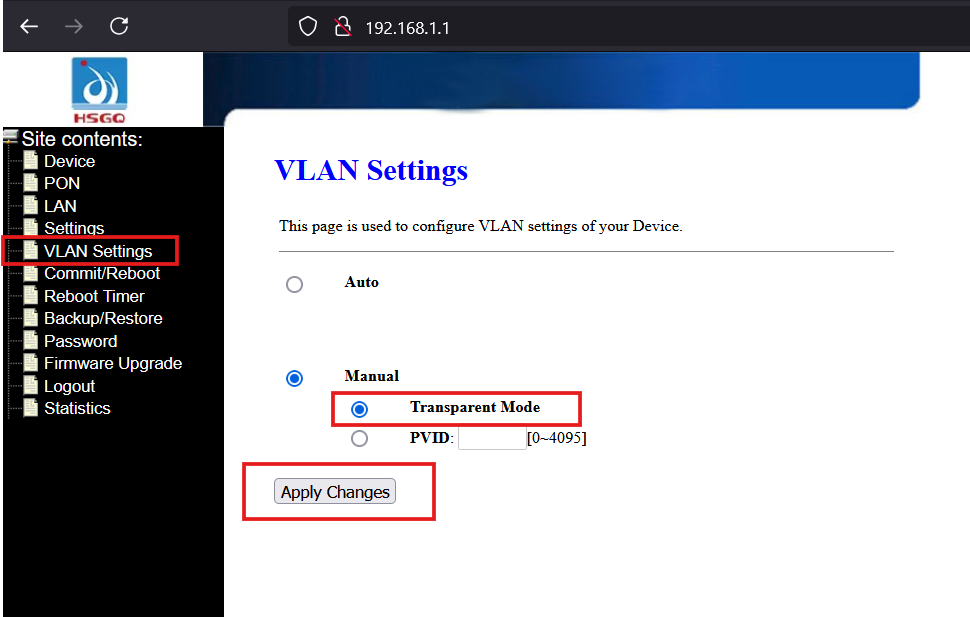
Step 3: Configure VLAN Settings
- Go to VLAN Settings.
- Select Manual.
- Choose Transparent Mode or you can also set VLAN here as well.
- Click Apply Changes.
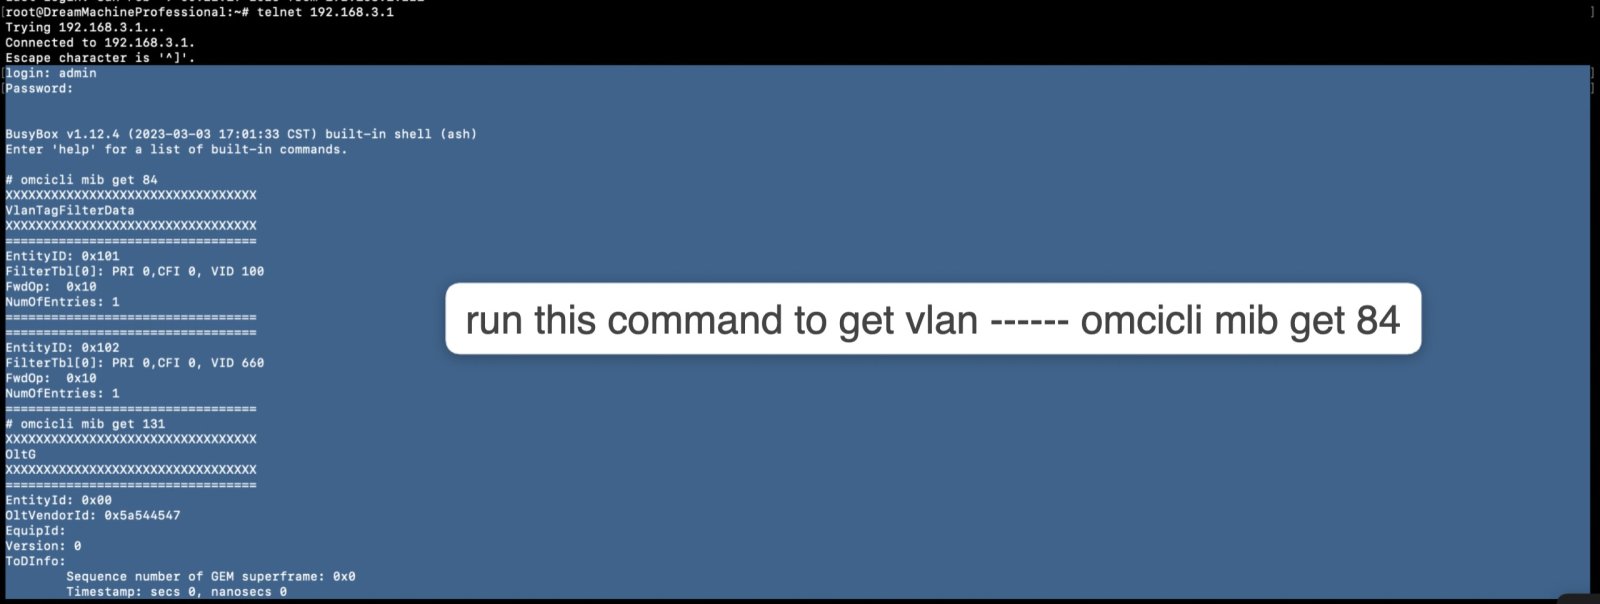
Step 4: Search VLAN for your area
- Telnet to your SFP using cmd or terminal.
- Run this command
omcicli mib get 84 - You will generally get 2 VLAN one is internet other one is for Voice try both and see which one works for you.
- Airtel uses 100 as VLAN all over India[99% area] for internet but those areas having Tejas & ALCL OLTs VLAN changes.
- As seen in screenshot below VLAN is 100 in my case put this VLAN either in sfp itself or in your router.
Step 5: Connect the Fiber Patch Cord
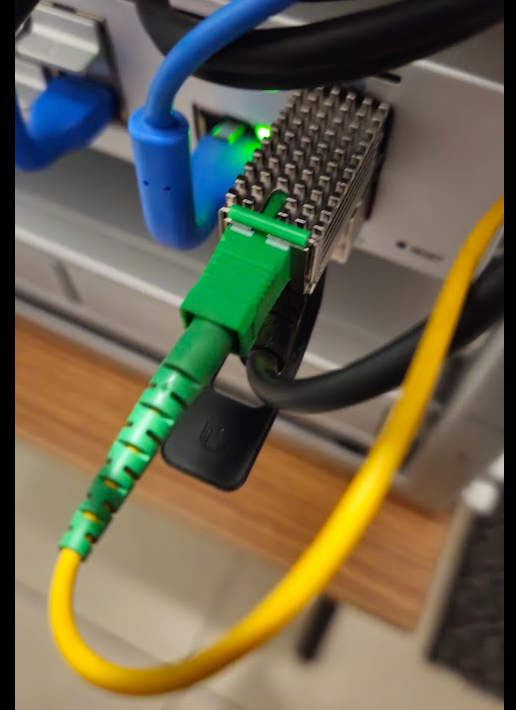
- Wait for about 2 minutes to allow the connection to stabilize.
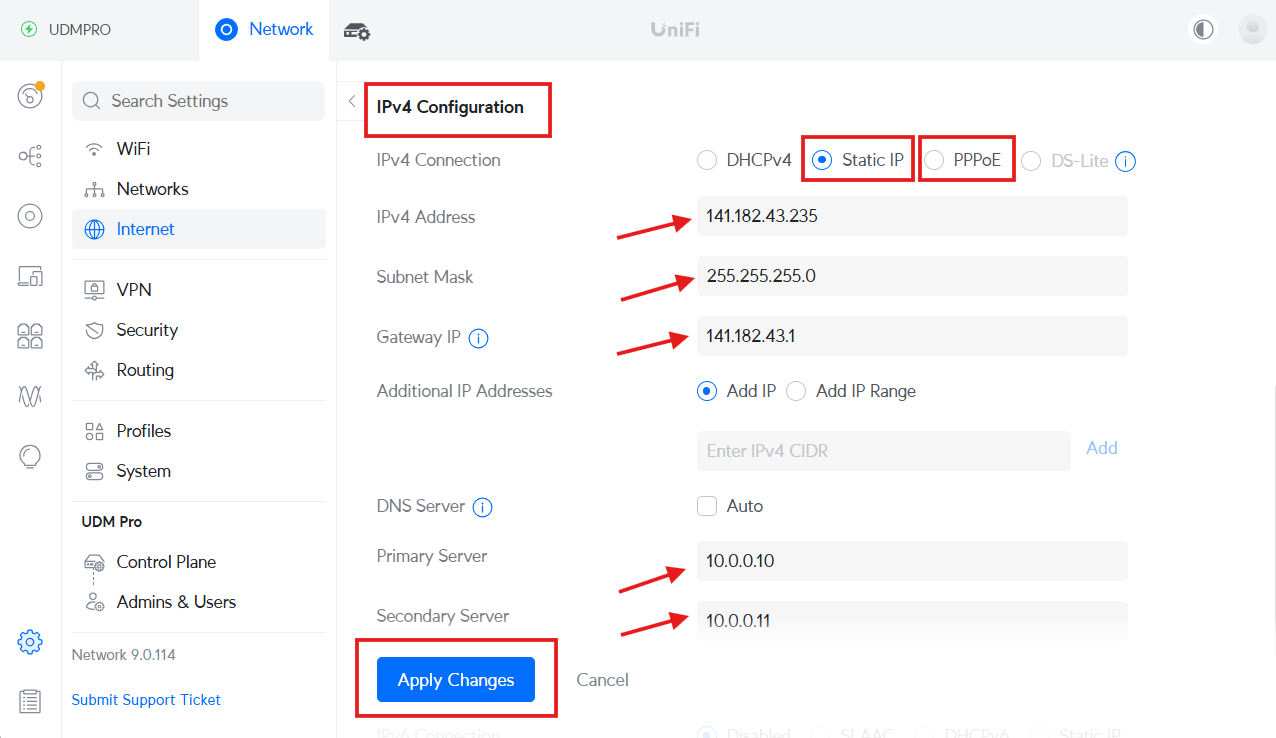
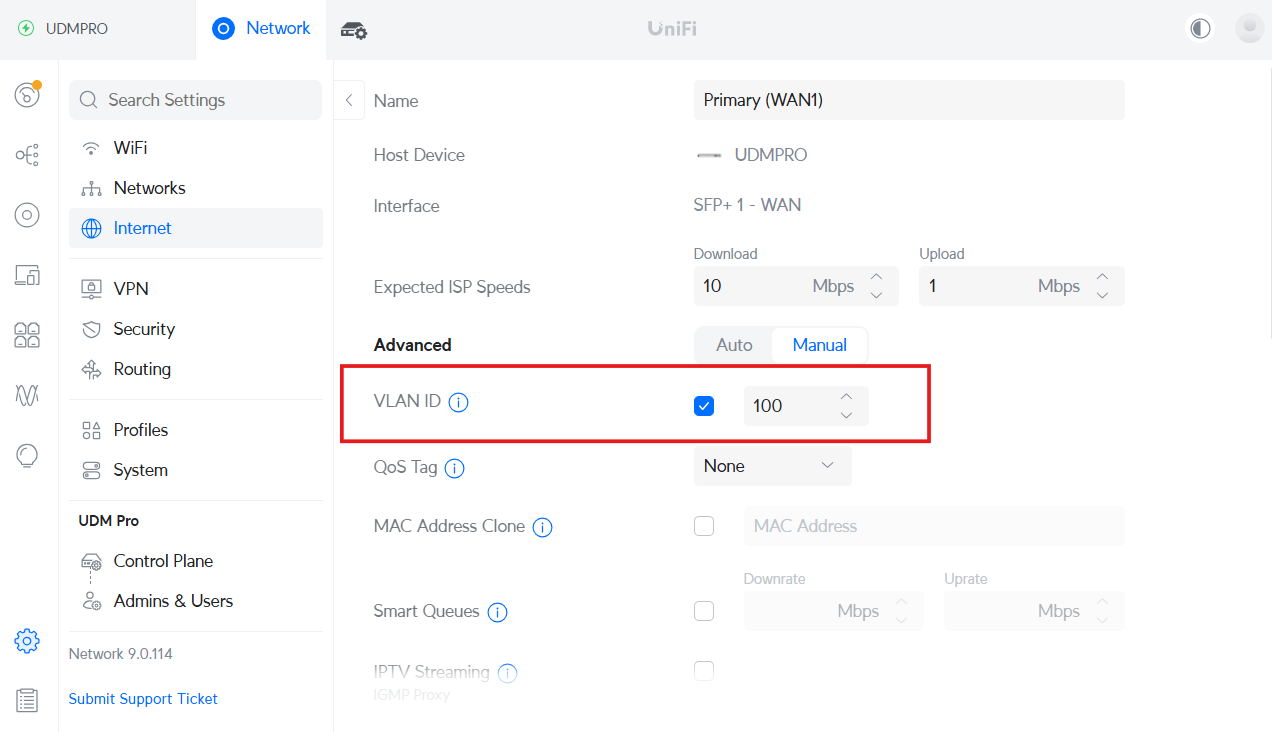
Step 6: Configure Internet Settings on your router [UDM Pro here] to Access Internet
- Open the UDM Pro Portal.
- Navigate to Settings > Internet > Primary (WAN1) > IPv4 Configuration.
- Enter VLAN ID as 100.
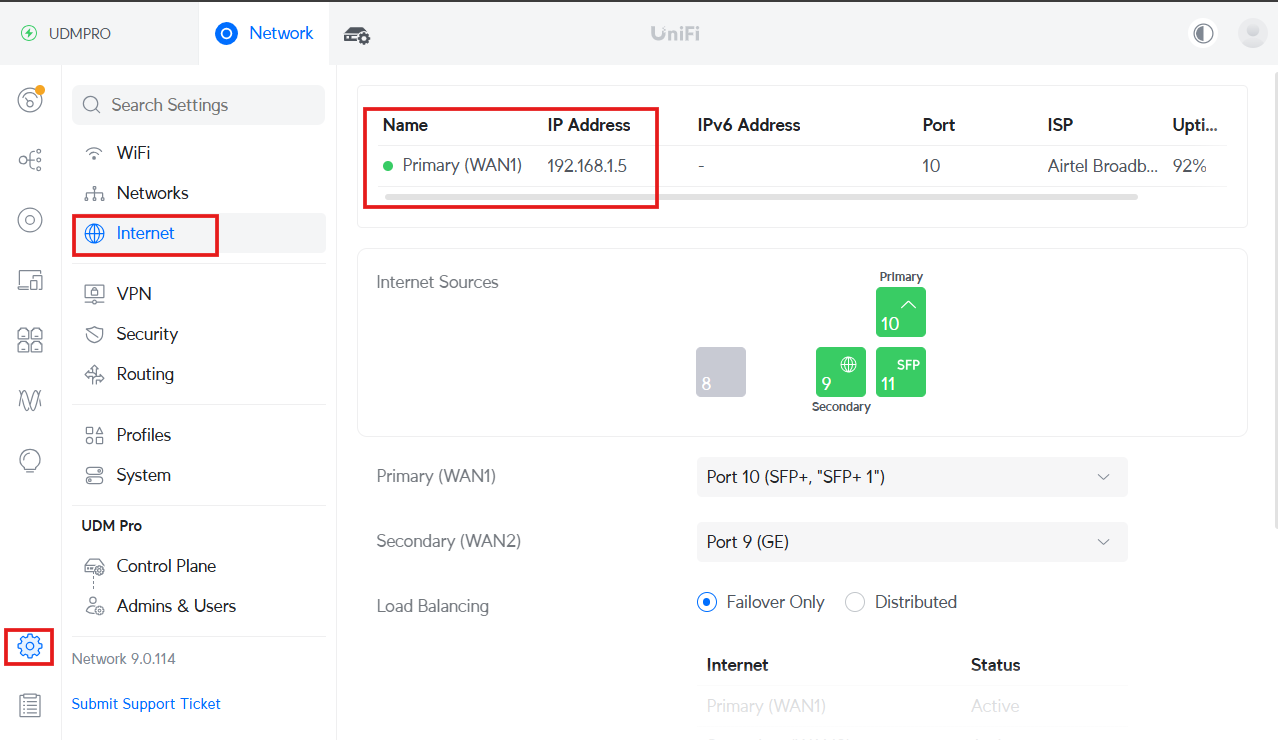
- Choose one of the following options based on your Airtel connection type:
- Static IP): Enter the IP Address, Subnet Mask, and Gateway provided by the Airtel team.
- PPPoE : Select PPPoE and enter your username and password provided by Airtel.